The Steps
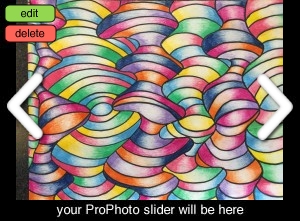
- Use #2 pencil to draw Draw 6+ vertical waves. Alter space and curves so that they feel like they pucker and bloat.
- Draw a simple wave horizontally across the middle of the page to designate where you curve will rise and or dip.
- Use thin Sharpie to draw upward curves above the middle wave and downward curves below the middle wave. Make you curve like a U. Repeat this process on every vertical section. Do not draw the middle line in Sharpie, this line is Erased before you start shading.
- Color each section gradating color from dark to light to dark. Use an analogous color and apply same gradation pattern. Alternate colors in each vertical row.
- Use different colors for each vertical section.
To get a perfect blend of colors- shade lightly the entire shape with a color of your choice,
- Next shade full strength – leaving a small area in the middle lighter for the highlight, use white pencil to blend the middle.
- use black or a darker color to blend the sides of the shape.